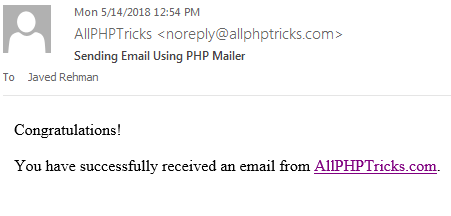
There are various ways to send email using PHP. First option is by using simple PHP Mail Function but this function does not provide more functionality such as CC, BCC, or attachment etc that we are needed now a days, solution of our problem is PHPMailer, it is the most popular PHP library used to send emails. It was initially released in 2001 after that it become a favorite choice of PHP developers to send email through it.
Steps to Send E-mail Using PHPMailer
- Create email address and password from Cpanel
- Create PHP file to send email with name index.php
1. Create email address and password from Cpanel
To create email address and password from CPanel, login to your web host cpanel.
After logged in, go to Email >> Email Accounts
In Add Email Account, create a new email with any username that you wish, here i created with username noreply and entered your desired password twice and click on Create Account button.
Now your email is created successfully, we will use this email address and its password in below PHP script to send email.
We will also need to know our host which will be required in PHPMailer, for this purpose after creating email, scroll down you will see your newly created email address below on the same page. Click on Set Up Mail Client to view your host address and other details. However mostly host uses mail.domain.com while some uses localhost or 127.0.0.1 . I will also use mail.domain.com in my host setting below.
2. Create PHP file to send email with name index.php
Below is the script in PHP which will be sending email using PHPMailer library. Click here to download PHPMailer library to include in your file. Make sure to upload this library in your web host.
PHP
In the above script i have explained each step through comments with almost each line. However i will also explain some important point here.
In $mail->Host you have to replaced mail.yourdomain.com with your website mail host.
If mail.yourdomain.com not working in your case, you can use localhost or 127.0.0.1 You can find more information about it from your Set Up Mail Client setting.
$mail->Username and $mail->Password will be those email and password which we created in step 1.
In $mail->From and $mail->Sender must be your domain name email address therefore i am using $email_from in both places which have domain name email which we created in step 1.
If you know that recipient name then you can use it $mail->AddAddress($email_to, "Recepient Name"); otherwise we can use it $mail->AddAddress($email_to);
If you want to send email in CC or BCC you can use the following:
$mail->AddCC('username@email.com'); $mail->AddBCC('username@email.com');
If you want to send an attachment, first you must have that file on your web host, you will need to provide its URL in here $mail->AddAttachment('files/readme.txt'); You can see that files/ is directory on host where readme.txt file is already uploaded which will be attached in email before sending.
Using $mail->Send(); is compulsory, otherwise email will not be sent. If you do not want to check if email sent or not, then you can simply write $mail->Send(); this will send your email. However i am checking if email is not send then show error otherwise it will show success message.
Once you done the above steps, then open the file index.php on web browser it will send email and also print a message of success .
Now you can check your email to verify if you have received email or not.
If you have any query regarding this tutorial, you can leave you comment. I will try to give possible answer to solve your issue.
If you found this tutorial helpful, kindly share it with your friends and developer groups.


No comments:
Post a Comment